Thursday, July 31, 2014

Photoshop Alternative

 
Symmetry Replicated
Canon 60D, Tokina Pro DX-II 11-16mm f/2.8, f/10, 1/50s, 100ISO, 11mm


Being an amateur photographer, my budget for gear and software is very limited. Everyone knows about Photoshop, made by Adobe, but used to be too expensive for someone like me. There is always the option to obtain a pirated copy, but being older now, I don't see pirated software as an option.Adaobe has since changed their pricing model, so now Photoshop is a subscription based program. The cheapest option is the Photographer's bundle, which is Lightroom and Photoshop for $10 a month.

When I first got my dSLR, I would use the included Canon software, the Digital Photo Professional. It was good software for simple editing of RAW files. But I was wanting more functionality. I ended up discovering Adobe Lightroom. It is a very powerful piece of software at a reasonable price, I believe I purchased it when it was on sale for less than $100.

Adobe Lightroom allows for editing of RAW files, settings such as white balance, contrast, tweaking shadows, highlights, whites, and blacks levels. You can adjust the Tone Curves, manipulate individual color channels (Hue, Saturation, and Luminance). Sharpening, noise reduction, lens correction as well. And cropping, simple cloning/healing, adding graduated filters, among other items.

Another great function of Lightroom is its catalog feature. I try to make sure I tag all of my photos soon after importing, using specific keywords. New York City pictures would get a tag NYC, New York City, the boro it was taken in, time of day, location if it is a landmark. I try to include keywords of the people in the photos as well, if it was a specific event, that becomes a keyword. 

But sometimes there are functions that Lightroom can't do, such as layers, complex cloning, among other things. I decided to give GIMP a try, an open source program. I had used other open source programs before, such as Open Office, Libre Office, Audacity, Thunderbird, Linux, Firefox, the browser I use to create these blog posts. Even my phone's OS, Android, comes from the Open Source movement. I found GIMP to be a little hard to get used to at first, but anyone trying Photoshop for the first time would think that was hard too. 

I have found GIMP to do exactly what I need. I'm not doing fashion shoots, or creating photographs for magazine covers, so my manipulation is mostly simple level tweaking, with the occasional cloning out of an object that got into the frame.

Would love to hear if anyone else has had experience with GIMP, or any other photography related open source software. Leave me a comment below!

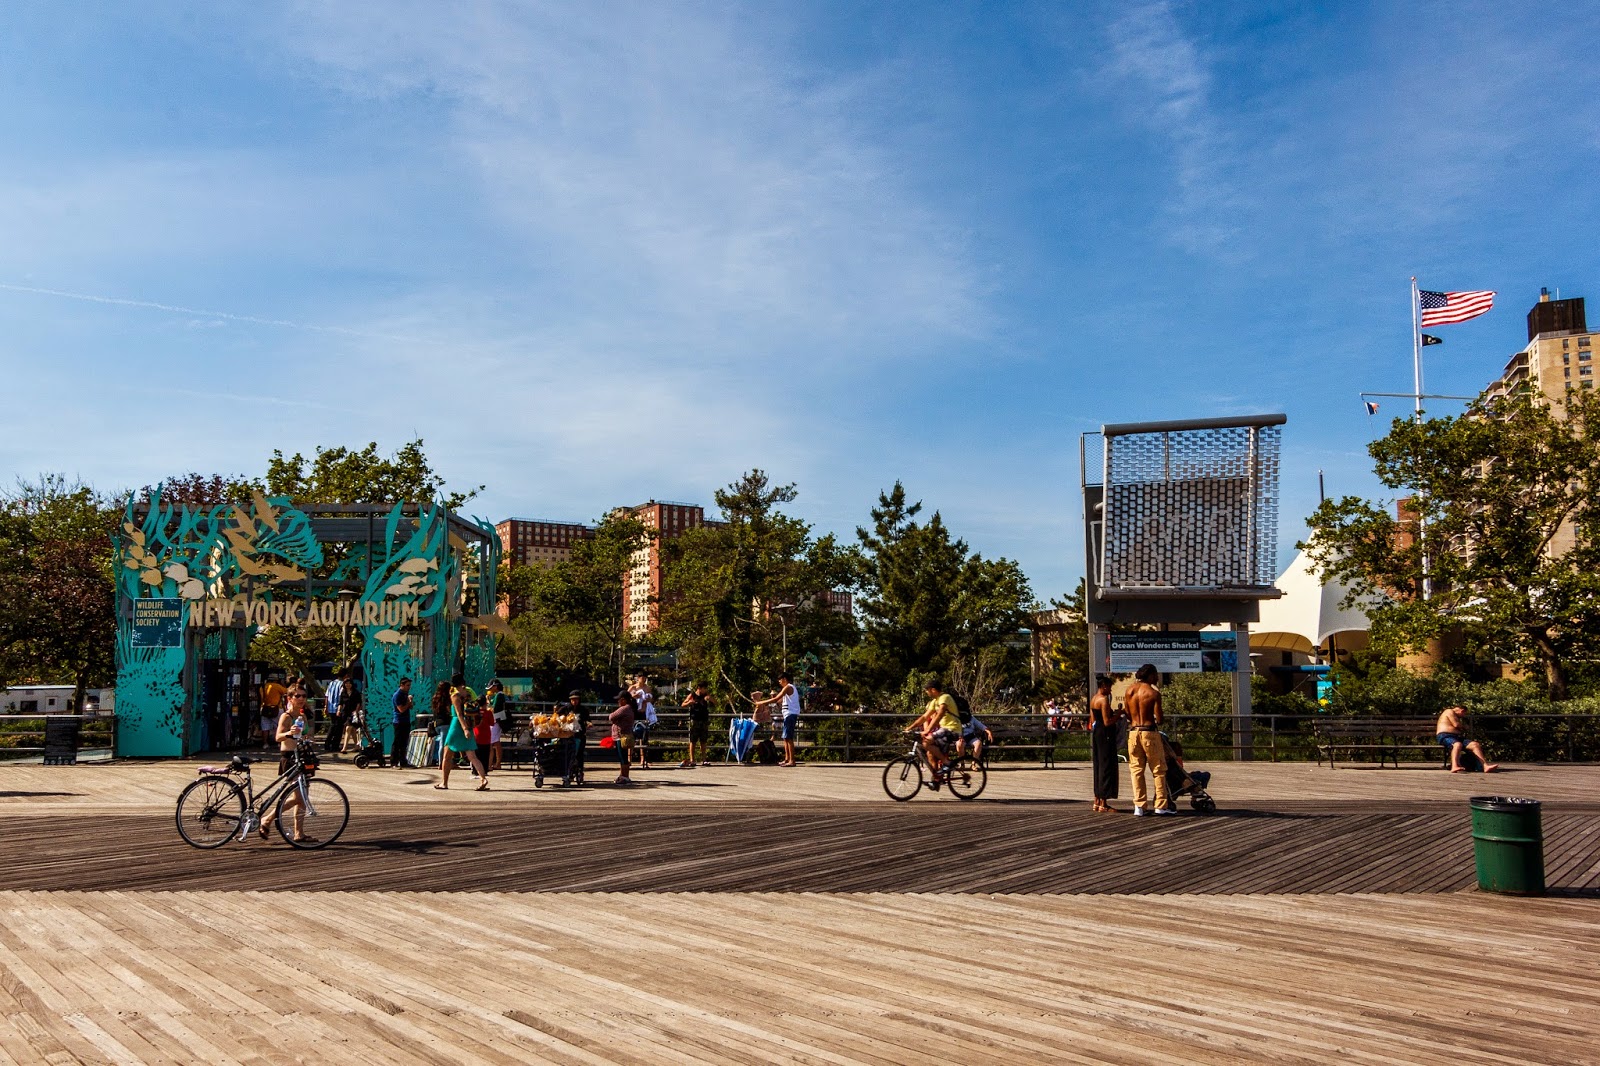
Original Image before GIMP edit
Canon 60D, Tokina Pro DX-II 11-16mm f/2.8, f/10, 1/50s, 100ISO, 11mm

Tuesday, July 29, 2014

Emergency Vehicles

I was going to post something about always bringing your camera with you, but the three of the photos I had picked happened to be of emergency vehicles.

What's scarier, the dentist, or Homeland Security?
Canon 60D, EF40mm f/2.8, f/5, 1/80s, 1600ISO, 40mm
It was a cold, long winter this year, with lots of snow. Even Fedreal Protective Service didn't shovel out their car.

FDNY Zooming down Broadway
Canon 60D, EF40mm f/2.8, f/5, 1/160s, 640ISO, 40mm
 I captured the above image when walking to an event gig. Decided not to take the subway downtown since it was a beautiful autumn day. I took a lot of shots that day; some may end up here in the future.

Super Bowl Boulevard
Canon 60D, EF40mm f/2.8, f/8, 1/1000s, 320ISO, 40mm
 I normally avoid Times Square, but Broadway between Herald Square and Times Square became Super Bowl Boulevard in the week leading up to the big game, so took a stroll after a meeting one day. This is looking downtown at 36th Street and Broadway, a video installation of columns to promote New York Tourism.

Monday, July 28, 2014

Shorty Forty

One of the things that every photographer suffers from at some point is gear lust. You want to buy every piece of gear available, more lenses, perhaps a better body, lots of accessories. I am no different. 
 
Underground
Canon EOS Rebel T3i, EF50mm f/1.8, f/1.8, 1/60s, 400ISO, 50mm

My first photography purchase was actually the Nifty Fifty, the Canon EF 50mm f/1.8 lens. I used this lens with the company's Canon Rebel T2i, before I had purchased my first body, the Rebel T3i. It was great, I could shoot wide open (aperture at f/1.8) to get that oh so desirable bokeh. It is a cheap lens, I picked it for $109 before tax.
 
Fallen Wood
Canon EOS Rebel T3i, EF50mm f/1.8, f/2.8, 1/250s, 100ISO, 50mm

The Nifty Fifty, and the Shorty Forty, are both prime lenses, meaning that they have a fixed focal length. Prime lenses are great photographers of all skill levels. They usually have faster apertures than a zoom lens, lighter, and cheaper as well. One of the things that a fixed focal length also forces a new photographer to do is think about composition. Zoom lenses allow you to be lazy, all you have to do is zoom in or out from your same vantage point. A prime lens forces you to zoom with your feet. If you want to get more of the scene in the frame, you have to physically walk back, if you want to fill the frame with your subject, you have to get closer. Sometimes, you are not able to physically get closer or further, so you will have to change your framing to compensate, look at the scene in a new way. 
 
From the Hip
Canon EOS Rebel T3i, EF50mm f/1.8, f/1.8, 1/60s, 100ISO, 50mm

I believe on of my best investements was a prime lens. Of course, when I first obtained my Nifty Fifty, I was shooting everything wide open, which at f/1.8, allows more light in, allowing for faster shutter speeds, but will create a shallow depth of field, so the part of the image in focus was minimal. When you move from a kit lens that only opens to f/3.5, you can't help yourself.

When my Rebel T3i was stolen, I had the Nifty Fifty mounted. I was glad that it was the cheap lens, though I was still bummed about the whole camera gear being stolen, I tried to look at the bright side of things and realize it could have been worse. The Rebel was replaced by a Canon 60D, so my primary lens was the Canon EF-S 18-135mm f/3.5-5.6 kit lens that was purchased with the now stolen Rebel. After Christmas about 8 months later, I had some gift cards, and decided I wanted a prime lens again.

Having owned the Nifty Fifty, I knew it was cheap, but there were somethings about it I didn't like. It felt cheap, the AF motor was noisy. My budget was low, as I only had a couple gift cards, so the EF 50mm f/1.4 was too expensive as were a few other primes.

Canon had released a pancake lens, called that because of how flat it was, and my interest was piqued.The pancake lens, the Shorty Forty, or EF 40mm f/2.8, was a little wider than the 50mm, but since I shoot on a crop body, I thought that would be fine. Many sites have said that 50mm on a full frame camera is about the equivalent of what your eye sees. On a Canon crop body, the 50mm is about 80mm, while the 40mm is about 64mm.

I ended up purchasing the Shorty Forty. Though the max aperture is f/2.8 as opposed to f/1.8, you end up stopping down the aperture anyways, so that wasn't too big of and issue. Reading reviews, time and time again they discussed how sharp it was for the price, even wide open. I decided to purchase it and am very happy I did.
 
Sunset over Manhattan from Queens
Canon 60D, EF40mm f/2.8, f/8, 1/1000s, 100ISO, 40mm

One of the things I like most about the Shorty Forty is how small it is. I can leave it mounted to my 60D, and the camera isn't large or cumbersome to carry around when I go out with my family, or even if I just throw it in my bag on the way to work. I found myself wanting to take my camera more places. When shooting for work, I sometimes would just throw the Shorty Forty in my pocket while the camera body will have the wide angle attached, and it allows me to capture some details shots, as the minimum focusing distance is pretty close for a non-macro lens. 
Signs of Spring
Canon 60D, EF40mm f/2.8, f/8, 1/125s, 160ISO, 40mm

There is one thing that I don't like about the lens. The lens focusing mechanics only work when the camera is on. This means that if you leave the lens protruding, though it doesn't that much, you can't manual focus it back when the camera is off. This also means that the lens can't focus when used with cheap macro extension tubes since those tubes don't have electrical contacts. Other than that though, this lens shines! 
Auburndale Snow
Canon 60D, EF40mm f/2.8, f/8, 1/50s, 640ISO, 40mm

I highly recommend this to anyone looking for their first foray outside of the kit lens their camera came with when purchased. It probably is attached to my camera more than any other lens at this point.

Wednesday, July 23, 2014

Wide Angle Wednesday

Summertime has always meant visiting Coney Island ever since I moved to New York City. This year has been no exception. But this last trip, decided to take the wide angle lens with me.

New York Aquarium Boardwalk Entrance
Canon 60D, Tokina Pro DX-II 11-16mm f/2.8, f/16, 1/125s, 100ISO, 14mm


Unfortunately, the New York Aquarium was hit hard by super storm Sandy in the fall of 2012. They are still rebuilding, so it is a very quick trip, but still worth the admission as we are members!

Shore thing
Canon 60D, Tokina Pro DX-II 11-16mm f/2.8, f/16, 1/160s, 100ISO, 13mm
These restrooms popped up after Sandy as well.

A trip to Coney Island deserves a stroll down the boardwalk. Usually a trip to Nathan's as well, but at least some sort of unhealthy food option. My sister, one summer when she visited, ordered a corn on the cob from Nathan's Famous, and was disappointed. I had to point out that they are famous for their hot dogs, not their corn!


Boardwalking
Canon 60D, Tokina Pro DX-II 11-16mm f/2.8, f/16, 1/320s, 100ISO, 13mm

We used to frequent the Freak Show there, but haven't in a couple years, perhaps next year. I'm sure our daughter will enjoy it when she is 3 going on 4.

Boardwalk Vanishing Point
Canon 60D, Tokina Pro DX-II 11-16mm f/2.8, f/16, 1/100s, 100ISO, 11mm

Thursday, July 17, 2014

Photo Contest

The Empire State Building is currently holding a contest for photos of their building on the ESB Facebook page. I submitted one of the first photos I took with the Tokina Pro DX-II 11-16mm f/2.8 lens that was purchased through work for capturing events. I originally posted this photo on Instagram at the end of March. Since my office was across the street, it was a convenient target to shoot on my way back from B&H. Just had to fight off the people trying to sell tickets or bus ride tours to the tourists. They see a camera and automatically assume you are a tourist.

Pretty sure all of the readers of this blog are friends of mine on Facebook, but in case there are those of you who are not, I would appreciate it if you would take the time to vote for my photo at this link: http://bit.ly/1rENS6R

You will have to "Like" the ESB to be eligible to vote. 

And just so you see which one is mine, here it is in larger glory:

Empire Rising
Canon 60D, Tokina Pro DX-II 11-16mm f/2.8, f/8, 1/200s, 100ISO, 11mm
 

Wednesday, July 16, 2014

Wide Angle Wednesday

Today's Wide Angle Wednesday are a couple of shots from Red Hook, Brooklyn of the New York Harbor during sunset, one evening was clear, one was overcast. Statue of Liberty is visible in both shots.

Jersey City, Downtown Manhattan
Canon 60D, Tokina Pro DX-II 11-16mm f/2.8, f/4, 1/200s, 320ISO, 11mm

Cloudy Liberty
Canon 60D, Tokina Pro DX-II 11-16mm f/2.8, f/10, 1/160s, 200ISO, 13mm

Tuesday, July 15, 2014

Bayside Day Opening Reception

Little Bay Sunset
Canon 60D, EF40mm f/2.8, f/8, 1/1250s, 320ISO, 40mm
As I stated in a previous post, my photograph of a local business owner was featured on the Bayside Historical Society's Website and would be on display in the Bayside Day exhibition. Friday was the opening reception for the exhibition, and I attended with my wife and daughter. Somehow, I got my times mixed up, so like a true New Yorker, we were fashionably late. 

Even though we were running late, I had to stop and grab a picture of the sunset. I was a little disappointed that the opening reception was on the 11th of July, as that was one of the last two days of Manhattanhenge, when the sun aligns with the east-west streets of Manhattan. I always seem to be working when it happens, or like last year, the weather was rainy. For the record, I was too drained on Saturday after a day at the beach to venture out for the second day.

2nd Floor
Canon 60D, EF40mm f/2.8, f/8, 1/60s, 1600ISO, 40mm
We were greeted at the door by Executive Director. She gave my daughter a little tiara so she could be a princess in the Castle, the term for the old Officer's Club where the Historical Society now calls home. She also had the upstairs ballroom opened so that my daughter could dance around if she wanted, and I was interested in exploring the Castle myself. We will have to return to look more in depth as there is a third floor that we did not see on this trip.

My work on display
Canon 60D, EF40mm f/2.8, f/4, 1/50s, 3200ISO, 40mm
It was very cool to see one of my photographs physically displayed outside my house in a size larger than 8"x10", and on canvas. Made me want to have more of my photos printed and displayed, at least within my home.

Camera House Flyer
Canon 60D, EF40mm f/2.8, f/4, 1/60s, 3200ISO, 40mm
We took some time to look at some of the other displays, from the hats that were worn during the different eras of Fort Totten's existence, to the current exhibition on the construction of the Clearview Expressway and Throg's Neck Bridge. I didn't have the luxury of time that I wanted to fully explore all of the exhibits, but was impressed with what I did see. I cannot wait to return!

Little Bay Nightfall
Canon 60D, EF40mm f/2.8, f/4, 1/80s, 3200ISO, 40mm
As we left, I had to take one more picture of Little Bay with the Throg's Neck Bridge after sunset.

Saturday, July 12, 2014

Post Processing a Single RAW

34 Street Vanishing Point
Canon 60D, Tokina Pro DX-II 11-16mm f/2.8, f/4, 1/50s, 100ISO, 11mm
High Dynamic Range, or HDR Photography is a style that polarizes the photography community. There are plenty of resources out there that will explain what HDR is, and how to accomplish it, but I will attempt to give a summary. 

Your camera has a dynamic range, in simple terms, it is how much data it can collect from blacks to whites. Some cameras have better dynamic range than others, but as of now, no camera is going to have the same dynamic range as your eyes perceive. If you take a picture of a high contrast scene, the camera will not be able to gather all the details in the dark areas and the bright areas, even though you are able to see the shadows and the lighter areas fine. One way that some photographers combat this problem is to utilize HDR. One method of HDR photography is to bracket your shots, that is to take one shot for "proper" exposure, then another shot a stop or more underexposed, and another shot overexposured. Using software, such as Adobe Photoshop, or what I use, Photomatrix, you will then combine these images into one image to give you a final HDR image.

The problem with some HDR photography, much like any post processing techniques, is that the result can look "overbaked". I suffered from this when I first started. You push the sliders too much, and you are left with an image that looks completely unnatural. I try to keep my processing towards the natural side these days and aiming to tweak to compensate for my cameras short comings. I want to convey what my eye saw when I captured an image. Not to say I don't take a little artistic license with some landscape shots, but I also am not trying to create a gaudy over saturated image either.

I'm going to share how I created the above image from a single RAW.

I started with capturing an image, trying to nail the exposure in camera to limit post processing needed. Unfortunately, the dynamic range of the scene was too broad, with the dark shadows and bright sunlight. I had taken the image handheld, and hadn't thought to bracket the shot. So I had one RAW image to work with, which should allow me with enough leeway to go about 3 stops over or under exposure in post.

After importing my image into Adobe Lightroom, I tried to see if I could edit it to a version I was happy with, but was still a little too blown out, or too dark. So I decided to make a two virtual copies in Lightroom.

Original Image with Lightroom Edits
The original base image was reduced by half a stop in exposure, tweaked the highlights, shadows, blacks and white, with clarity bumped up as well. Lens correction, which applies distortion correction and remove color fringing, was applied, as well as some sharpening. As you can see, the sky is a little too bright, and we are loosing some of the details in the shadows.

The "first" virtual copy received the same edit since it was a copy of the original image. Then the exposure was increased to 1.5 stops (2 stops over the above image). The darker areas of the image are now more visible. That gave me this result:

Overexposed Virtual Copy #1
The "second" copy had the same edits, but then exposure was decreased to -2.5 (2 stops less than the original edit). The sky has turned from white to the blue that I saw when taking the image. The result gave me this:

Underexposed Virtual Copy #2
 At this point, I now had three images. I then used the Photomatrix plugin for Lightroom to merge the three images to a 32bit HDR file. The file created was a TIFF. The new file received a little more editing in Lightroom, and the result was the image in the beginning of the post. 

I hope you enjoyed a peak at my workflow!

Friday, July 11, 2014

Another Vanishing Point

Recently received some feedback from a couple of friends that said they loved the vanishing point post. So this post is for you!

Sunrise in Queens
Canon 60D, Tokina Pro DX-II 11-16mm f/2.8, f/4, 1/320s, 640ISO, 16mm
Living in New York City, I am constantly seeing vanishing points. The straight railroad tracks of the commuter railroads and subways, the grid pattern of streets in Manhattan, the rising modern skyscrappers, I can't escape them!

34th Street Vanishing Point
Canon 60D, Tokina Pro DX-II 11-16mm f/2.8, f/4, 1/50s, 100ISO, 11mm
This shot of 34th Street was taken from a rooftop, about 9 stories high. This was a single image, but due to the lighting conditions, I ended up creating an HDR image out of the single RAW file. I will share this processes in a future post.

Wild Asia Monorail Wait
Canon 60D, EF 75-300mm f/4-5.6, f/8, 1/400s, 800ISO, 75mm
This shot from the Bronx Zoo is from a telephoto lens I inherited from my uncle. My family and I are members of the Wildlife Conservation Society, which grants us admission to four zoos and an aquarium. Needless to say, we take full advantage of our membership and are at a zoo a lot. 

Highline Park
Canon 60D, EF-S 18-135mm f/3.5-5.6, f/8, 1/125s, 400ISO, 18mm
 Highline Park is a park that was built on the remnants of a former elevated freight train line on the West Side of Manhattan in the Chelsea neighborhood. It is a recent addition to the city, the park that is, the elevated structure was completed in 1934. Interstate trucking reduced the need for the elevated line, leading to destruction of the southern section in the 60s, and the last freight train was in 1980.

Thursday, July 10, 2014

Pushing yourself outside your comfort zone

Many photography sites talk about finding your style. Readers of this blog will probably deduce that my style is cityscapes/landscapes. I do live in the greatest city in the world, the City of New York! So naturally, I capture what is around me. I prefer capturing the architecture, the vistas of this fine metropolis. Others that live here prefer capturing the people, the every day life, the human factor, in other words, street photography.

Street photography is fine, but not something I am that interested in pursuing. I follow a few great street photographers on Instagram, as I feel it is always good to take in as much creative influence as one can.

When photographing for our work portfolio, I am also focusing on the room, the environment, not the people or attendees. Some have told me I should pursue event photography, but to be honest, I don't really enjoy shooting people, with a small exception, my daughter. Even when out with friends, I find that I end up not capturing the group if I bring my camera. 

Photographing people makes me feel a bit awkward. Give me a stunning vista, animals in a zoo, a cool car, I am happy, but when the subject turns into people, I just don't feel I can do them justice. I feel like I am never able to get those candid shots, and the ones I try I capture people with their mouths half open, making a weird face. My wife is very loving, as she has not killed me for some of the unflattering pictures of her that I've taken in the past, though she may make me delete them.

So when I was perusing the Bayside Historical Society's website, I came across a call for photographers. They are having a 100th Anniversary of Bayside Day exhibition. I contacted them, hoping I could share some of my scenic shots of Bayside. Turns out that they were looking for photos of Bayside business owners.

This was something I almost decided not to do. But recently, I have been trying to push myself outside my comfort zone, such as leaving a job where I wasn't happy to a job where I didn't know what would happen. So I decided to suck it up, get over my fear, and reach out to a local business to try to get a photograph of the owner doing his trade. 

Pesso's Open All Year
Canon 60D, EF40mm f/2.8, f/7.1, 1/80s, 1600ISO, 40mm

This required me to go into one of my favorite local businesses, Pesso's Italian Ices, try to get a moment of the owner's time, and pitch the idea of a portrait shot of him at work. I went there with my toddler in tow, as a cute little toddler always helps get people to say yes to you. After I ordered and paid for our delicious ices, I asked to speak with the owner.

Gidon Pesso came from the back and allowed me to make my pitch. He hadn't heard of the upcoming exhibition, but was gracious enough to agree to allow me to come back the next day with my camera gear to get a photo of him at work. The only issue was he would be leaving at the time I usually get home from the train.

The next day, I had prepped my camera gear before leaving for work. I headed in a little early so I could leave a little early to catch Mr. Pesso at the tail end of his day. Grabbed my camera gear and headed over to the shop. The gear I chose was my dSLR, the Canon 60D, the kit lens, EF-S 18-135mm f/3.5-5.6, and a flash, the Yongnuo YN 560 III (a manual flash head). The shop is very small, as many are in New York City, and I didn't know where I was going to shoot in the space, so that is why I choose the flexibility of the kit lens. I stopped it down to f/8 to get a good depth of field in addition to knowing that that lens seems sharper there than wide open.

I also had prepped myself with a model release form. Found a couple good resources through a few of the photography websites I follow, and modified a form to my use. Mr Pesso had no problem signing it, as I also was giving him usage rights to the photograph as long as I was given credit, and I was given rights to display the photograph however I wanted to; this form protected both of us.

So many delicious options!
Canon 60D, EF-S 18-135mm f/3.5-5.6 IS, f/8, 1/125s, 200ISO, 50mm

As I arrived, I was nervous. I didn't want to waste the man's time, so I had to make sure I had my settings dialed in correctly. I asked for him when I arrived, and was told it would be a short wait as he was finishing up making some of the ice in the back. When he came out to greet me, he asked me what I needed. I told him I just wanted to capture him at work, plying his trade. I suggested that perhaps I could get a shot of him making the ice, but was greeted with a smirk and told that no one could see the magic, which is understandable. So I asked if I could get some shots of him scooping some ice as if serving a customer. Asked which type of ice, I immediately answered with Rainbow, good old Red White and Blue!

I took a shot of him to check my settings, the flash was too powerful. Dialed that down, captured a couple of other shots. In total, I took five shots. All I needed was one great image to submit. I emailed it the next day after a little post processing in Adobe Lightroom. Imagine my surprise when I see that it was the featured photograph on the Bayside Historical Society's Events page! Pesso's even posted it on their Facebook page (though they spelled my name wrong).

The opening reception for the exhibition is Friday, July 11th at 7:30pm at the Castle in Fort Totten, the home of the Bayside Historical Society. I was bummed at the choice of date, as it also happens to be one of the last two nights of Manhattanhenge this year. But I will be there as a proud photographer. This is the first time my work has been displayed to the public in a non-digital format. 

And all because I pushed myself outside my comfort zone.


Gidon Pesso of Pesso's Italian Ices
Canon 60D, EF-S 18-135mm f/3.5-5.6 IS, f/8, 1/125s, 200ISO, 18mm

Wednesday, July 9, 2014

Wide Angle Wednesday Top of the Garden Edition

MSG
Canon 60D, Tokina Pro DX-II 11-16mm f/2.8, f/4, 1/40s, 3200ISO, 16mm
One of the perks of my job is I get to see the city from different vantage points. Sometimes it is fancy hotels, other times it is rooftop venues with incredible views.  I am thankful that I am not chained to a cubicle staring at the same walls every day.

ESB
Canon 60D, Tokina Pro DX-II 11-16mm f/2.8, f/3.5, 1/40s, 3200ISO, 16mm
 Both shots were taken handheld and processed in Adobe Lightroom 5.5.

Wednesday, July 2, 2014

Wide Angle Wednesday, Fort Totten Explored

Canon 60D, Tokina Pro DX-II 11-16mm f/2.8, f/10, 1/100s, 100ISO, 16mm
 This past weekend, the New York City Parks Department hosted a Tunnel Tour of Fort Totten. This is a tour that is rarely held, so I was excited to have the opportunity to attend.  The tour consisted of two parts, exploring some of the old Endicott System which consisted of 5 disappearing guns, and a chance to enter the old Main Magazine, where gunpowder was stored for the cannons on the battery.

Due to a larger than expected turnout, the tour was split into two groups; my group explored the Endicott section first.  Though the disappearing guns are long gone there are some remnants of the support structures for them, such as the munitions elevators, power panels, and rails.

Canon 60D, Tokina Pro DX-II 11-16mm f/2.8, f/8, 1/80s, 100ISO, 16mm
I was with my wife and toddler on this tour. I was not able to get the shots I really wanted to get, or had imaged obtaining before I arrived, due to a daughter demanding to be carried and the large amount of attendees. Most of the people that attended had never ventured to Fort Totten before, but my family are frequent visitors. In fact, we just found out that our daughter made the lottery and will be taking swim lessons at the pool that is in the old parade grounds of the Fort!

Canon 60D, Tokina Pro DX-II 11-16mm f/2.8, f/8, 1/40s, 640ISO, 11mm
I would love to go back to the Endicott section with less people, but I'm also not the type to break into areas, so that will probably not happen. We were told that there have been many film shoots in this area, as it is a perfect distressed prison setting. White Collar on USA is one of the shows that has done a fair amount of shooting not only in the Endicott area, but in Fort Totten in general.

Power Plant
Canon 60D, Tokina Pro DX-II 11-16mm f/2.8, f/4.5, 1/25s, 3200ISO, 11mm
Shooting in manual, I had to anticipate what settings I would need depending on the lighting. Some of the tunnels were almost in complete darkness, with my cell phone flash serving as a flashlight. Outside in the bright daylight, it was between 1:00p and 2:00p, some of the harshest lighting conditions to shoot. Because of the amount of people, we almost were rushed from one area to another. I had to dial in some rough settings before encountering the subject.

Power Panel
Canon 60D, Tokina Pro DX-II 11-16mm f/2.8, f/4.5, 1/25s, 3200ISO, 11mm
Having shot in Manual mode for awhile, it wasn't that difficult for me to dial in my settings. One of the most important things is knowing the layout of your camera. Just like driving a car, you want to be able to change things without having to remove your eyes from the viewfinder.

The second part of my tour was a dark, dark place, the Main Magazine. The park rangers only had one working lantern, and by that time my cell phone was dead. None of my shots turned out that great unfortunately. I was unable to setup my tripod and do a long exposure, and I was polite and didn't blind people with my flash. 

Canon 60D, Tokina Pro DX-II 11-16mm f/2.8, f/5, 1/160s, 125ISO, 16mm

The rangers told us about a system of mirrors that was utilized since open flames would have been a very bad idea in a room full of gunpowder. Some soldiers would count their steps and walk through that area in complete darkness. 

Waterside Battery
Canon 60D, Tokina Pro DX-II 11-16mm f/2.8, f/8, 1/800s, 160ISO, 11mm
I was very glad I had the opportunity to attend this rare behind the fence tour of Fort Totten. Best part was, it was free! I recommend a visit to Fort Totten to anyone visiting northeast Queens. In October, the rangers host a Haunted Lantern Tour, which is a haunted house that is in the old battery. My family and our good friend Amy went last year, and it actually is one of the better haunted houses we've been to, and free!